
Xiaomi is China’s best Android smartphone and other technology accessories manufacturer with best battery backup. Xiaomi launched Redmi Note 8 Pro in the year 2019 with some attention-grabbing features. Xiaomi Redmi Note 8 Pro is a smartphone by the Chinese company that comes with the base RAM and storage variant of 6GB+64GB. It also comes in 2 storage and RAM variants i.e,6GB+128GB and 8GB+128GB. Xiaomi Redmi Note 8 is powered by a Mediatek octa-core Helio G90T processor coupled with an 800MHz ARM Mali G76 MC4 GPU.
Below in this guide, we will help you to flash the Magisk on Xiaomi Redmi Note 8 Pro using the SmartPhone Flash tool. Well, Magisk is a one-way platform to perform all the tweaks such as flashing personalized ROMs, personalized kernels, changing the system settings, as well as overclocking on your tool. To flash you need to initial develop, the patched boot img file, using Stock boot img from your own ROM file data.
Pre-Requisites
- Make sure your battery is charged over 70%.
- Backup Data on any exterior media or perform a Nandroid backup.
- Disable any anti-virus software you have installed on your computer system.
- Redmi Note 8 Pro USB cable offered.
- Make sure that you download and install all the needed files on your PC/Laptop.
- Download and Install Android USB Drivers – Download
- Xiaomi Redmi Note 8 Pro Stock ROM – Download
- SP Flash Tool Latest Version – Download
Warning: We are not responsible for any damage or problem occurred to your device while following this tutorial. Do it on your own risk.
What is Magisk?

Magisk is a systemless user interface which helps you to add different modules to the Android Device. It is based on the phh superuser, which is an open-source root solution. It works on any device running Android Lollipop 5.0+. With this, you can boost the use of your device, and also you get the most out of your Android gadget. It is not only a rooting application; it likewise permits the user to hide root from particular apps, as well as additionally give the ability to inject extra features into the Android OS conveniently. If you install the latest version of Magisk Manager, you can merely upgrade to the Magisk from within the manager application.
How to Extract and Patch Boot.image using Magisk?
Step 1: Download the ROM and draw out to your PC.
Step 2: Attach Xiaomi Redmi Note 8 Pro using a USB cord and copy the boot.img data from the extracted folder to your Xiaomi Redmi Note 8 Pro storage space.
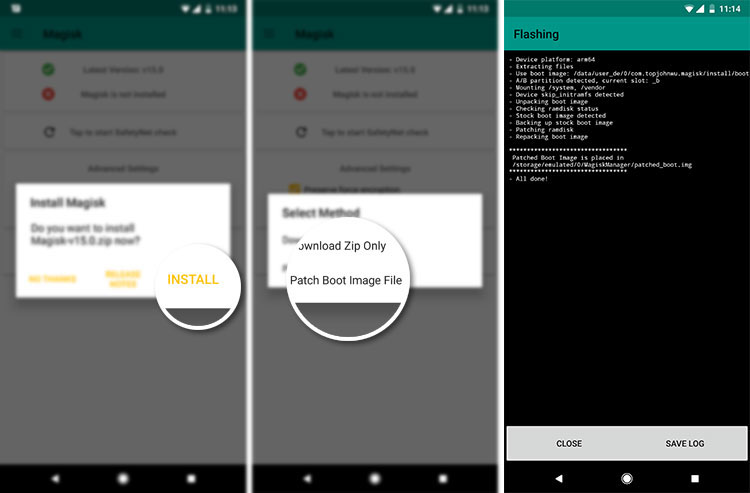
Step 3: Download and Install the Magisk Manager Application. When a popup appears asking to set up Magisk, setup the Magisk Manager Application.
Step 4: Tap on “Patch Boot Image File”.
Step 5: Browse to interior storage and also select Xiaomi Redmi Note 8 Pro boot image that you moved earlier.
Step 6: Wait for several seconds; Magisk will start patching the boot image.
Step 7: Copy the “patched_boot. img” from the internal storage space, as soon as the boot image has been patched and replace it in the same extracted Xiaomi Redmi Note 8 Pro ROM folder on your computer.
After extracting and patching boot.img using Magisk, now its time to flash patch boot image on Xiaomi Redmi Note 8 Pro using SP Flash Tool.
What is the SP Flash Tool?
Smartphone Flash Tool is an application that can be mounted on your computer or laptop and additionally aids you to flash stock ROM, Customized ROM, unbrick bricked tools, format/erase, and so on. This application is specially created for devices running MediaTek processors. SP Flash Tool has a lot of features; if you want to know the detail features of the SP Flash Tool, you can read this article.
Steps to Install the Patched Boot Image on Xiaomi Redmi Note 8 Pro using SP Flash Tool
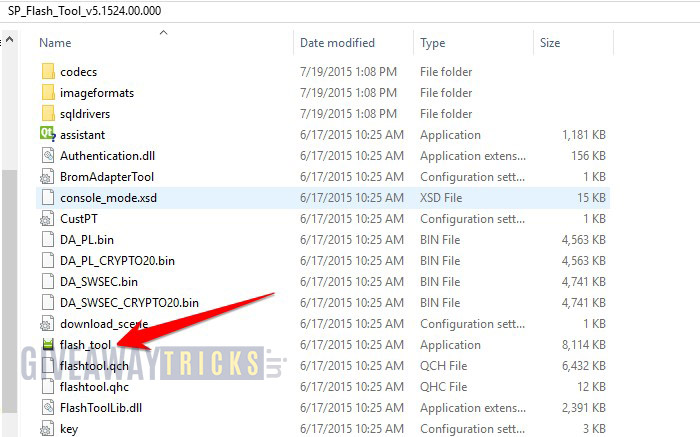
Step 1: Download SP Flash tool on your PC from the above Pre-Requisites section and run the flash tool exe file. sp flash tool
Step 2: When the SP Flash tool is installed, you will see the screen with a smartphone image. Now Touch on the Download button.
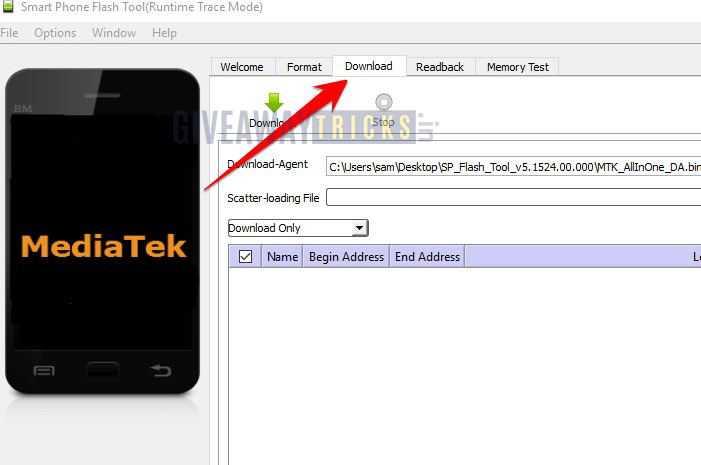
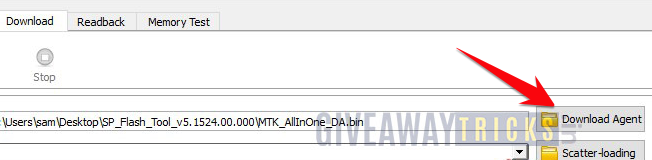
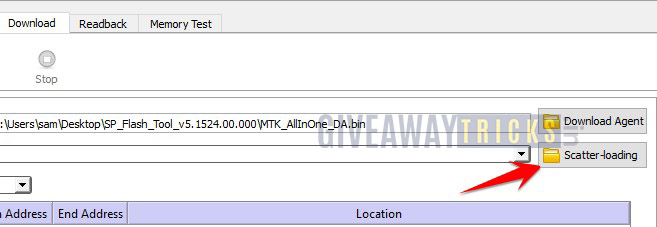
Step 3: In the download tab, click on the Download Agent and MTK_AllInOneDA.bin option (It is inside the SP Flashtool folder > SP_MDT) download agent.
Step 4: In the very same tab, tap on the Scatter-loading menu and load the Scatter file, which is inside the Xiaomi Redmi Note 8 Pro Stock ROM extracted zip.
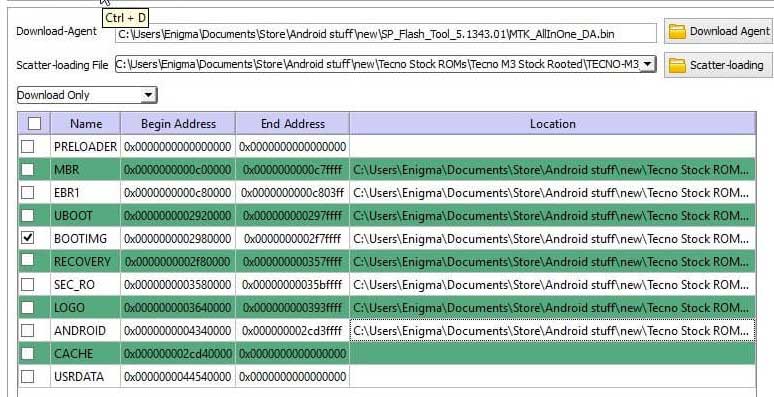
Step 5: Now load the MTxxxx_Android_scatter. Txt documents.
Step 6: Once you have loaded the scatter file, ensure to untick all the data other than bootimg.
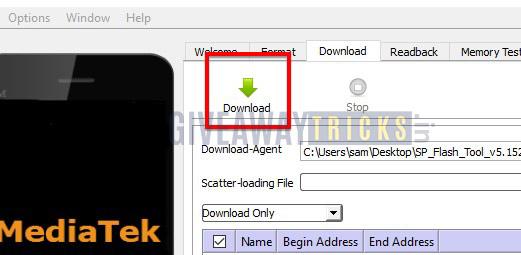
Step 7: Currently, click the Download button and install to flash.
Step 8: Currently to start the Flashing procedure, you need to remove your battery if the battery is non-removable switch off your device.
Step 9: Hold the Volume Down and also Volume Up button together and connect Xiaomi Redmi Note 8 Pro to computer or laptop making use of USB Cable.
Step 10: Flashing process will start once the phone connects with the computer or laptop. Wait for a few minutes.
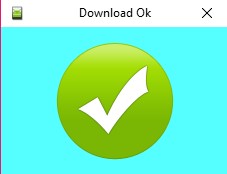
Step 11: After Flashing process has finished, a green circle will appear.
Step 12: Now, you can close the SmartPhone Flash tool application.
Step 13: After closing Smartphone Flash Tool Application, disconnect your Xiaomi Redmi Note 8 Pro from the computer or laptop and reboot it, to see if your device has rooted successfully.
Note: Do not interrupt the entire flashing process. If you do so, your phone will go off and not come on at all. You might get the “USB device not recognized” error on further flashing attempts. You can read this article to fix the standard error that occurs while flashing process using SP Flash Tool.
Conclusion
That’s it. If you followed every step correctly, you would be able to Flash boot image on Xiaomi Redmi Note 8 Pro using SmartPhone Flash Tool. We truly wish that you located this overview sensible. Just in case, if you have stuck somewhere in between the process or have any concerns connected with this topic afterwards, do not be reluctant to leave them in the comment section below.